|
Recent Projects - Nepean Custom Staircase Nepean Custom Staircase 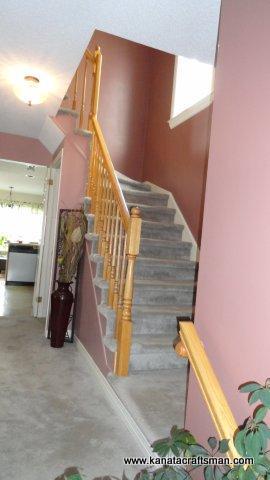
This was a home renovation we just completed in Nepean. It was for a great customer that has confidence in our work and is a pleasure to work with because she has great taste and she knows what she wants. This article will explain what is involved to properly replace a carpeted staircase with hardwood stairs without tearing out the existing staircase. It is intended to give our customers an idea of what is involved in a project like this and while not a complete how-to article for the DIY, it provides some very good advice on tackling this project. One of the first challenges you'll have once you decide to do hardwood stairs is to remove the carpet, under-padding and tack strips. Pinching the carpet in the right hand corner of the riser (just under the stair tread) with a pair of pliers and pulling is a good method to remove the carpet. After prying up the tack strips, you'll need a pair of needle nose pliers to remove all the staples from the carpet install. Believe me, there are a lot of staples! 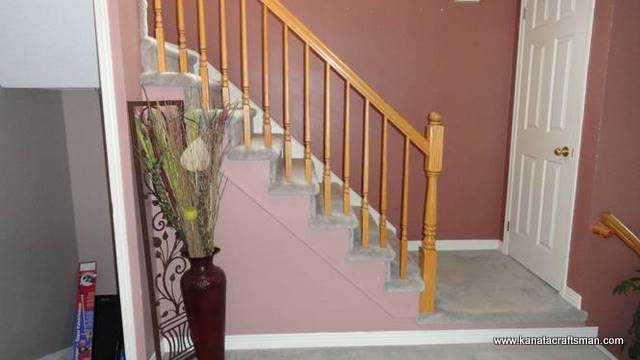
If you tackle this job, you'll want to be very careful of staples and nails from the carpet tack strips lying around that a child or dog could swallow or that you or a family member could step on. It's best to cordon off the area and clean up at the end of the day so no one gets hurt. Once you are down to the wood with all nails and staples removed, it's time to remove the stair railing. Count yourself lucky if you do not have a stair railing to remove and those that have gone through the tedious job of removing carpet around spindles and banisters will know what I'm talking about. Wooden spindles usually have a 3/4 inch wooden dowel in the bottom of them that are glued into the stair tread. If you are planning to reuse your existing staircase spindles, two pieces of scrap wood should be used at the very base of the spindle with channel lock pliers to twist the spindle back and forth to break the glue bond at the stair tread. Sometimes the top of the staircase spindle where it is inserted into the railing will also be glued and you will have to break this bond as well. Once you have loosened all the staircase spindles by twisting them to ensure there is no bond at the stair tread and hand rail, It's time to remove the screws used to secure the handrail to the bannister. In some cases, you'll have a flush plug to remove from the staircase bannister and in other cases you'll have a button plug. Button plugs are a little easier as you just have to carefully pry the plug out of the hole to expose the screw inside. If you have a flush mount dowel plug in the stair bannister, you'll need a spade bit the exact size of the hole. 1/2 inch are usually standard but you could also have a 5/8” plug in the stair bannister so make sure you measure. It will be difficult to get a clean hole if you start to drill a hole with a 1/2” spade bit and then realize the hole is 5/8”. We are going to assume you have half inch dowels in the stair bannister for this explanation but you'll have to adjust accordingly if they are different. Punch the centre of the dowel plug in the staircase bannister with an awl first to make sure you have a small guide hole in the centre of the plug. Next, a spade bit is best to start the hole and get a nice cleanly cut hole on the outside of the bannister. We will use and also recommend button plugs when reinstalling the staircase railing and his allows you to do all finishing work in the basement, garage, or workshop. Re-inserting dowel plugs in a staircase bannister would have to be sanded and stained after the staircase is re-assembled. You could use a forstner bit but a spade bit is the most economical way to accomplish this task. Keep in mind there is a metal screw inside the stair bannister and you run the risk of damaging your bit. You are only going to use the spade bit to accomplish a nice clean hole on the outside of your banister post so it can be reused (if that is your plan). You only want to drill in a half inch with the spade bit as the objective is just to ensure a nice clean hole on the outside of the staircase bannister post. Next, you'll use a half inch bit intended for metal to drill the remainder of your plug. You should be able to feel the lack of resistance once you drill through the end of the plug. You want to stop immediately as you don't want to drill into the head of the screw and make it difficult to remove. After the plugs are removed, the screws should be removed and assuming you have broke the glue bond on all staircase spindles, you should be able to tap up on the staircase handrail with a rubber mallet to remove the handrail. If you find there is a good glue bond between the staircase handrail and banister posts, a tool such as the dremel multi max with a thin blade should be used to cut between the two if you cannot loosen the bond. Cut from the bottom of the staircase handrail so any patching, if necessary, is not visible. When we are re-using the existing staircase hand-railings and bannister posts that are glued and difficult to remove, we will re-install our staircase bannisters about a quarter of an inch closer together which allows us to trim 1/8” off each end of the staircase handrail and remove any cut marks that were necessary. Once the staircase handrail is removed, the bannister posts are usually screwed into the staircase treads and can be removed by turning them counter clockwise. At this stage you should have some 2x4 material handy so you can install a temporary railing on the staircase as this job will not be accomplished in one day. Carefully run your hand on the top of the temporary railing to ensure there are no small wood fibres protruding to allow splinters. You want to ensure your hardwood stairs project goes smoothly with no casualties! 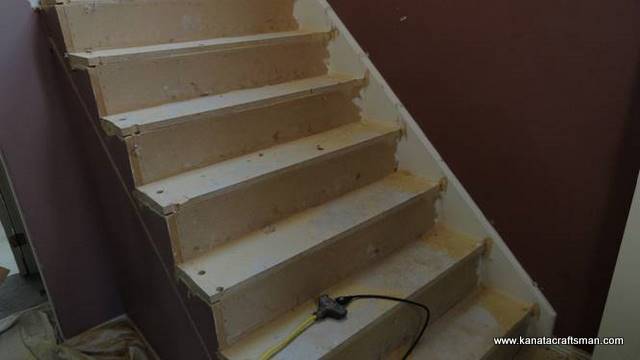
Now it's time to cut the nosing off the existing stair treads. These have to be cut flush with the stair riser in order to install new stair treads and risers. A skill saw is the best tool to remove most of the stair tread that overhangs. Measure the depth of your existing stair treads and set your skill saw blade to this depth to ensure you do not cut into the existing stair risers. You won't be able to cut right to the stair stringer but a sawzall or chisel will accomplish the rest. Be careful not to cut into the stair stringer as you don't want to compromise the integrity of your staircase. A close cut with the sawzall can be followed up with a chisel to remove the rest of the cut. This is the messiest part of the job so you'll want to cordon off the staircase with plastic from floor to ceiling to minimize the dust. Once the nosing is cut off the old staircase threads, you'll want to walk the entire staircase and address any squeaks and creaks prior to starting to install hardwood stairs over your existing staircase. Additional screws should be used to address any squeaks before installation of hardwood on your hardwood staircase. 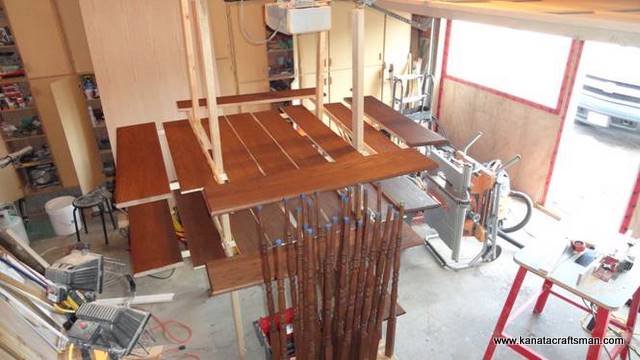
It's a good idea to per-finish all stair treads, risers, and spindles prior to installation of hardwood on your stairs which will give you the convenience of using the staircase to access the second floor even during construction. This is the best method to do your hardwood staircase. It is also a lot easier to stain and urethane with the grain before the hardwood is assembled on a staircase. While it is hard to see in this picture, our stair treads are 1 1/16 solid laminated oak. Yes, you can buy stair nosing to fit into staircase hardwood flooring and put it on your staircase but this isn't the finished product we would want to see in our home! Hardwood flooring on a staircas looks like “flooring” on stairs. The result you should be looking for is to see a staircase that looks like an originally installed hardwood staircase. Not a staircase that has been re-finished with flooring! You'll have to play around with stain to match your existing flooring with the staircase but I assure you the effort is worth the reward and our customer in Nepean would be more than happy to tell you this. 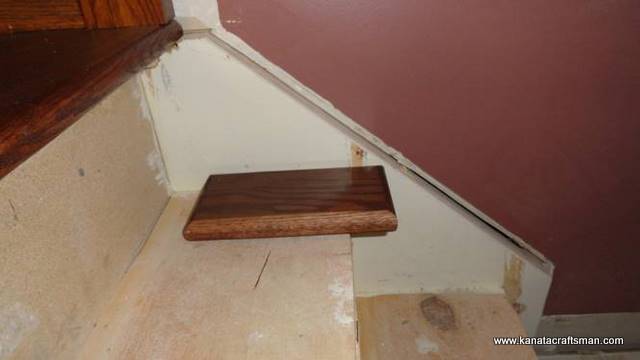
A very important point to keep in mind when putting hardwood over your existing staircase is that the new staircase treads will sit higher and extend further into the top of the staircase stringer. You will want to consider beefing up the stringers when resurfacing your staircase. This has nothing to do with the structure of the staircase but it has a lot to do with the aesthetics of the finished product. You will see in this picture with a sample piece of stair tread that if installed like this, the staircase tread looks like it is right at the edge of the staircase stringer. This is a common mistake we see when carpeted stairs are refinished with hardwood stairs. Don't get me wrong, the end result still looks good but we want our hardwood staircases to look as if it was the original install. The way our sample piece sits, it overhangs by two inches. With the half inch stair riser, it will overhang on the new hardwood staircase by an inch and a half. This is the maximum you want to overhang as any more is a trip hazard. You'll also want to check your local buildings codes if you are planning to refinish your staircase with hardwood stairs as tread depth, height, and acceptable variances in stair height are all considerations which must be checked against local building codes. 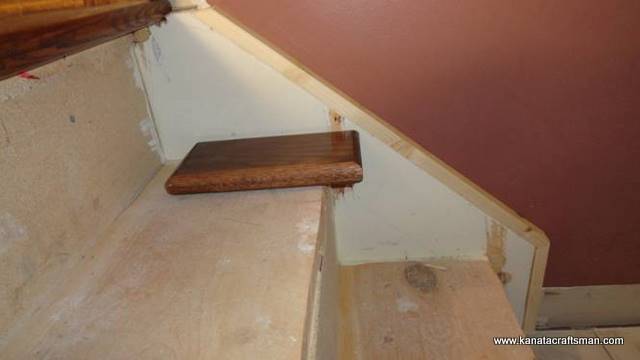
Here you'll see we have beefed up our stringers to accommodate the height of the new staircase. 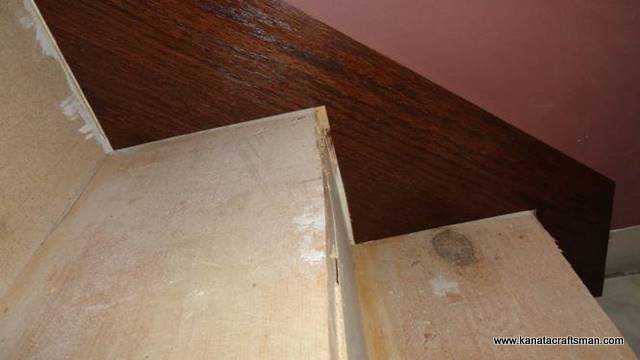
To face the existing staircase stringers, we use 1/8” plywood to maintain as much width on the new staircase as possible. The 1/8” plywood is cut flush with the top of the pine we used to beef up our staircase stringers. This allows us to nail our 1/8” oak plywood to the new stringer height. A consideration when fastening your staircase stringer facing is to use small finishing nails rather than a brad nailer. When using 1/8 plywood on your staircase stringer, a brad nailer counter sinks the nails a little too much for our liking. You'll also notice in this picture of our staircase that the staircase stringer is not cut perfect to the staircase tread and riser. You are afforded 1/2” margin of error on the staircase riser as well as 1 1/16 on the new staircase tread as that is the thickness of our staircase risers and treads. You should use PL premium to glue the new stringer to the existing staircase stringer. Keeping in mind our margin for error, nails to secure the new stringer to the existing staircase riser while the glue sets up only need to be flush with our 1/8” plywood as nails are located where they will not be visible once the tread riser, and molding to cap the new staircase stringer is installed. 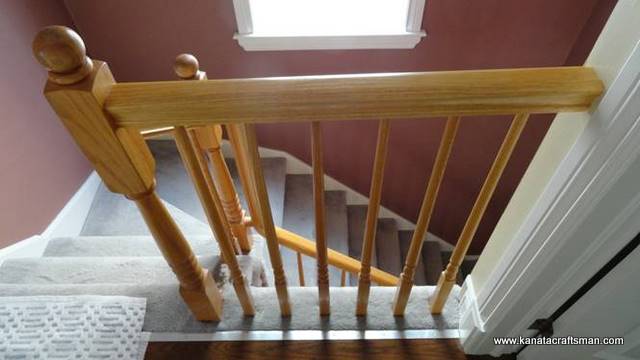
The best way to start a staircase renovation is to start at the top and work down. This way, when you install your new staircase riser, it is butted right against the underside of the new staircase nosing tread you just installed and you can install your next new staircase tread right against that riser This hides any gap from the bottom of the new staircase riser as well as most of your nails which are necessary to fasten the new staircase riser as the next tread is butted against this riser. When you see quarter-round between treads and risers on a renovation of a hardwood staircase, it is a tell tale sign that the job wasn't done the best way possible. Another issue we took into consideration when remodelling this staircase in Nepean is that when we went to start from the top, we had 7” from the installed hardwood flooring to where the nosing at the top of the staircase would be. As the hardwood flooring is 3 1/4 inches, That would put top spindles of the staircase right in the middle of two pieces of hardwood flooring and structurally and aesthetically, it isn't the best in our opinion. We wanted to see a solid piece of hardwood under those spindles. We're also not a fan of the workmanship involved in that handrail terminating into the wall without a half post and we'll also address this. 
We are using a 6” wide 1/4” piece of oak and will attach our nosing to form the top of the landing on this staircase. You'll want to have a piece of the existing hardwood flooring to use as a template to ensure you cut the grove in the right place to match the tongue of the existing hardwood flooring and ensure the height of the hardwood flooring is consistent at the top of the staircase. 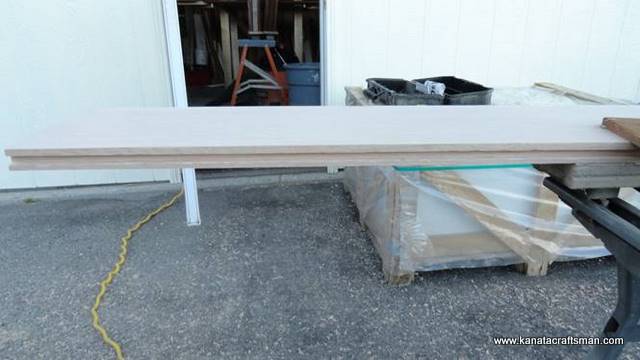
Our groove is cut and matches the existing flooring at the top of the staircase. This is very important as the flooring is per-finished and we will not be able to sand the piece once it is installed. 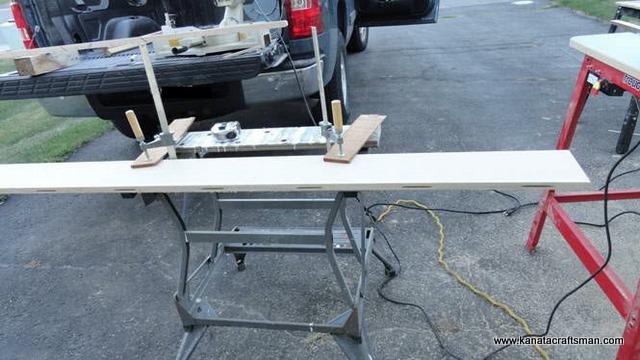
Biscuits are used to fasten our nosing to our hardwood plank. 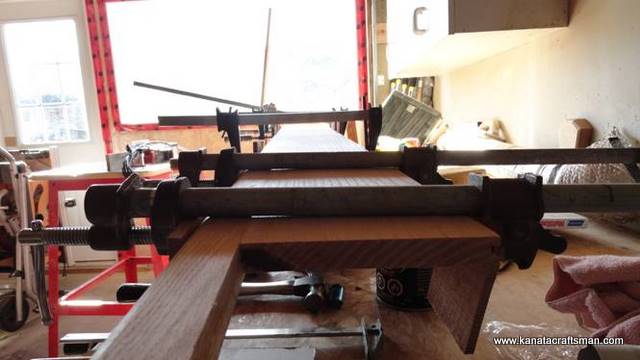
Once our plank and nosing is biscuit joined, it is glued and clamped. Our nosing is 5/16” thicker than our flooring at the top of the staircase. This matches the thickness of our new hardwood treads and the nosing on this piece will overhang the top of the plywood floor at the top of the staircase and allow our plank to sit flush with the hardwood floor of this Nepean home. We'll be able to sand this piece once the glue drys to ensure it is seamless. Notice the pieces of scrap used with the clamps to ensure you do not mar the staircase landing strip when clamping. 
The new stair stringers should be cut as long as possible and ideally, have no seams 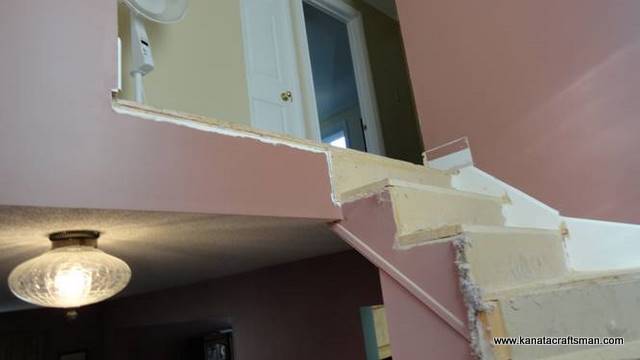
As you can see by the openness with the railing removed on this staircase renovation, a temporary handrail is extremely important. Additionally, once you cut the nosing off the existing staircase, the treads are a lot shorter and you are not use to navigating a step this short on a staircase. Going up is less of a problem than coming down. 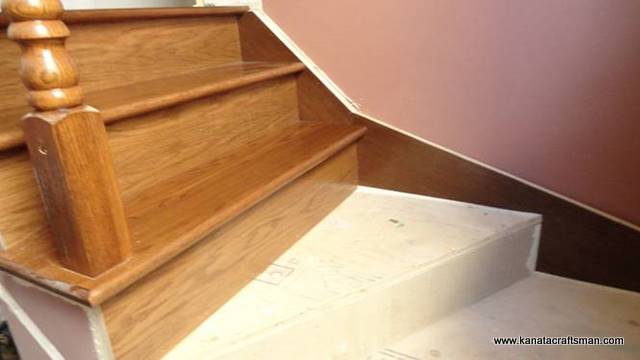
Starting from the top, we have installed our top plank and two treads and risers on the existing staircase. You will see the stair bannister and we installed the top part of staircase railing as quickly as possible. The next staircase treads to be installed are the winders which is one of the most challenging parts of renovating a staircase. They are very challenging to cut. With our intent to have all staircase treads meet the new stringer without any molding necessary, our cuts must be exact. Given that the piece of a laminated solid oak stair tread for these winders costs around $80, it is recommended that you purchase pine laminated shelving and practice this cut first if you are to attempt to remodel your staircase. Cutting laminated oak winders like this isn't something you can do on a table say. We made templates out of cardboard prior to cutting these staircase treads. Using our cardboard template, we cut our staircase treads about an 1/8” from our final cut. We then clamped a guide on the tread and used a edging bit in a router for our final cut. 
Continuing to work down the new staircase, you will see a temporary railing on the far wall which we advise our customers to use as a handrail instead of the safety railing on the outside of the staircase which is just rough 2x4s. The 2x4 you see sticking up is the bottom post of our temporary safety rail on the staircase. The temporary railing is removed while we work on the hardwood staircase during the day when our customer is at work. 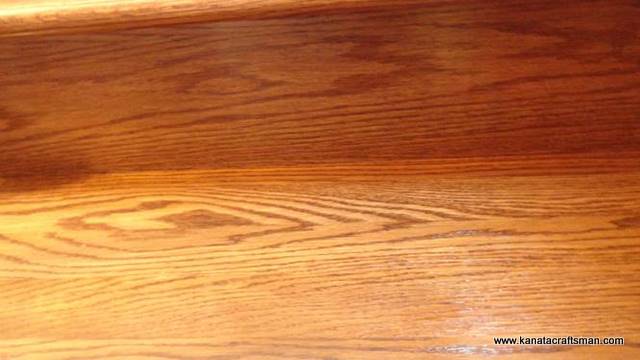
As previously mentioned, if you are to renovate a staircase, starting at the top and installing the new staircase risers first, and then the treads, allows a very tight fit with no molding necessary on a new staircase. 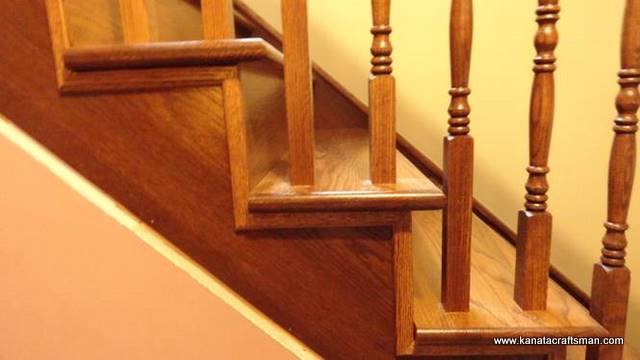
This view shows our molding on the outside of the staircase. Our moldings are custom made and a nice detail, but most importantly, necessary to hide the edging of the new risers on this staircase. 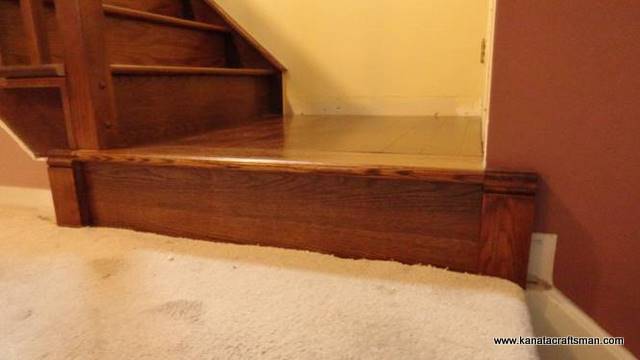
Our landing at the bottom of the new hardwood staircase would have the nosing protruding on both sides of the ground floor. Additionally, we will have a different thickness molding to cap the new staircase stringer on the left hand side. The best option when you have any type of different size molding meeting is to use a plinth block. We couldn't find an oak plinth block we were happy with so we made our own. 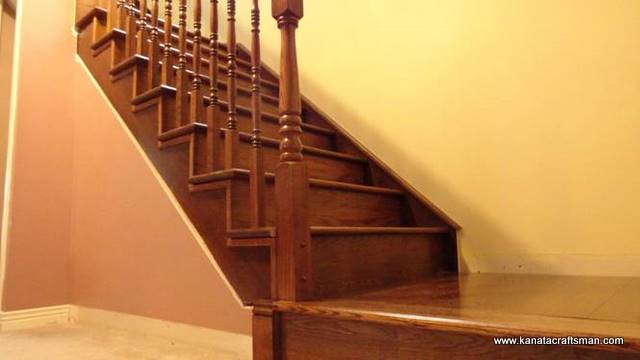
The capping you see covering the right hand side stringer of the new staircase is 1 1/2 by 2” oak which is recessed on the bottom to hide the nail holes on the staircase stringer. Once again, there was no material off the shelf that we were happy with while renovating this staircase and this really makes a difference on the overall appearance of this staircase. 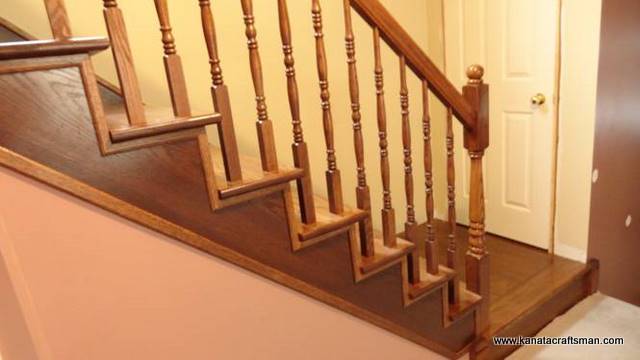
While the same colour stain was used for all wood while renovating this staircase, the stringers are a lot darker than the rest of the new staircase. The 1/8” plywood was a lot more porous than the hardwood and absorbed a lot more stain. I'm not talking about this customer in Nepean but I've had customers ask me if I could get all the same colour once I've stained for them. That isn't possible and that's part of the beauty of staining wood. Many pieces have a colour variance. If you want consistency in color on any wood project, stain is not the option you want to consider. The spindles were replaced on this staircase but the bannisters and railings were stripped and stained to match. 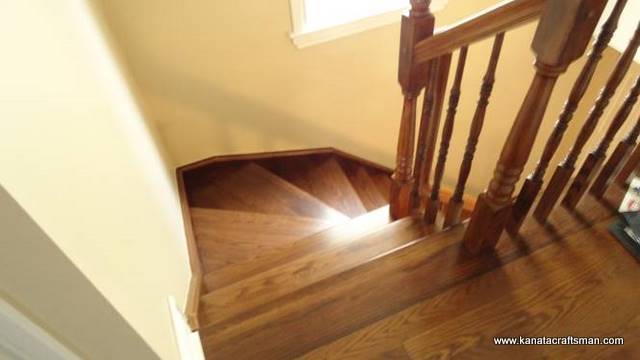
A solid piece of oak planking which matches the stain and finishing of the hardwood flooring is installed. It is flush with our hardwood flooring is installed under the staircase bannister and spindles. I love it when a job comes together! 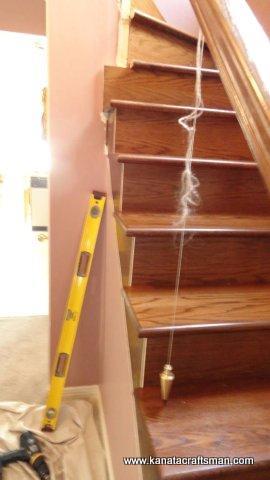
Once your staircase bannisters are re-installed, the railing should be temporarily reinstalled to the bannister. By drilling a hole in the centre of a piece of dowel, you can thread a string and use a plumb bob by inserting the dowel into the hole in the staircase railing and mark exactly where you need to drill the hole in the new staircase tread for your spindle dowel. An individual who works for me, and has come to understand the quality I expect, joked with me and asked me if I'm accounting for the gravitation force of the earth when marking these. The answer was no! 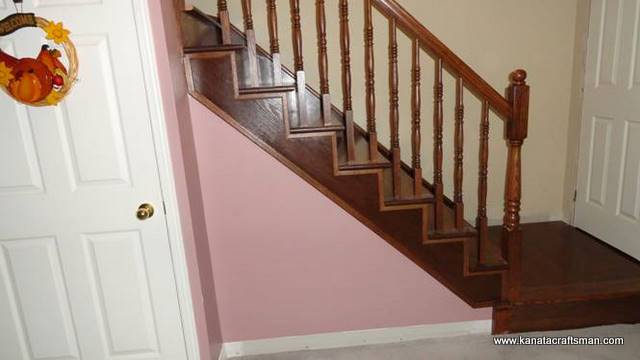
With the exception of molding and door casing, our staircase renovation is complete. I really have to learn to use photo-shop as the Halloween decoration on the door is distracting from the staircase! We will be doing hardwood flooring and painting next on the main level of this Nepean home. |