|
Recent Projects - Ottawa Home Renovation This was a large project we accomplished in Ottawa. The job consisted of installing an oak staircase, changing the ceramic tile in the entrance way to “something different”, and convert the living room into an office. Considering resale down the road, we discussed with the homeowner constructing this in a manner that would allow the flexibility to have this room used for either purpose depending on the needs of the next buyer. So here’s a picture of the staircase before we started construction. The first four stair steps had to be cut as we were going to be installing a sliding door here to allow privacy for the office. As we had to cut the stair stringer for the bottom four steps, we were compromising the integrity of the staircase. There’s no margin for error here and to do this properly, we had to remove the old and install a new oak staircase. 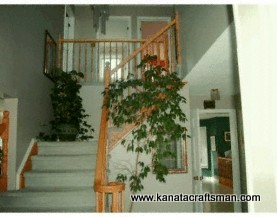
Here’s a picture of what the finished staircase should look like. It’s great when a customer gives you something like this as there is very little misunderstanding between what the customer wants the contractor to achieve. Plain and simple, “here’s what I want, can you do this”? If you are planning on remodeling a room down the road, it’s best to start by surfing images and clipping pictures out of magazines for different ideas as they definitely assist in communication when you are contracting out a renovation. 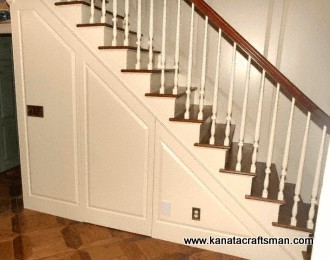
We started by removing the carpeting and stair railing. If you are considering on changing your stairs from carpeting to hardwood, or any room for that matter, one way to save some money when contracting out a job like this is to discuss the option of removing the carpeting yourself with your contractor. 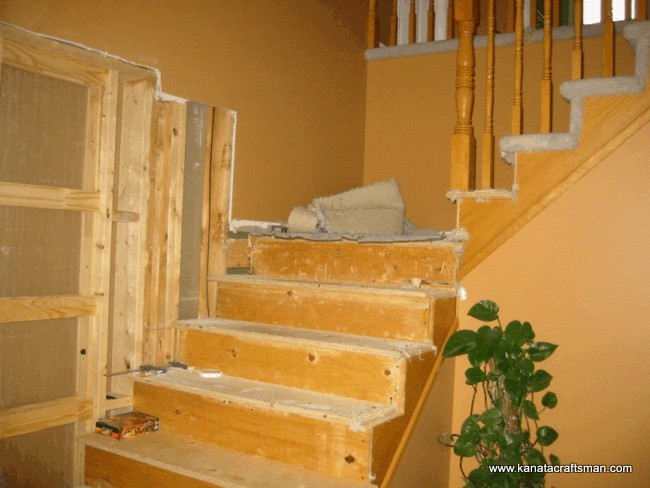
Here’s a top view of the staircase after cutting the stringer and treads to install the framing for the pocket door. Stringer was temporarily braced for a short period to allow access upstairs during construction. A section of ceramic tiles were removed to allow the framing for the pocket door to sit directly on the plywood floor. Removal of ceramic tile is an onerous task. If you are planning to remove ceramic tile, boots, knee pads with plastic reinforcement, safety glasses and gloves are a must as well as keeping family members out of the area. Small shards of very sharp ceramic material are dislodging and flying everywhere as you break this up. You’ll also save yourself a lot of grief if you replace the subfloor prior to your new tile installation. 
We got our new oak staircase and safety railing back up as quickly as possible. As we were using the same spindles on the reinstallation, they were primed while unassembled. This allows easy access to the entire spindle as you have to use steel wool to thoroughly scuff the varnish to ensure the primer will adhere properly to the spindle. Staining and varnishing every second oak tread allowed access upstairs and was a way to minimize the inconvenience during this renovation. 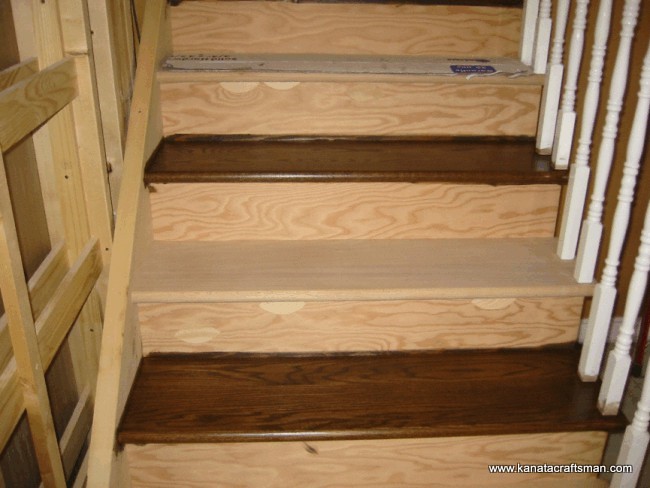
Keeping in mind the look we were trying to achieve, the staircase had raised paneling on the walls. You couldn’t accomplish this look with trim and I wouldn’t recommend it be attempted as it is counterproductive to trying to increase the value of a home. We made our raised paneling out of MDF which was the most economical way to go. This job is accomplished with rail and style router bits which are the same bits that are used to construct raised panel kitchen cupboard door. There is a lot of custom work here. A high quality dust mask is a must when you are custom cutting MDF. We also stripped and sanded the oak hand rail while it was apart. Working with a solvent stripper should only be done in a well ventilated area using a high quality mask. 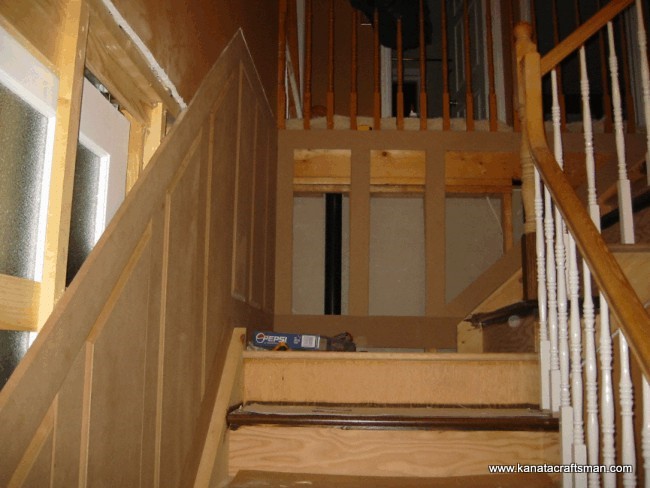
Our raised panel installed to complement the side of the oak staircase. 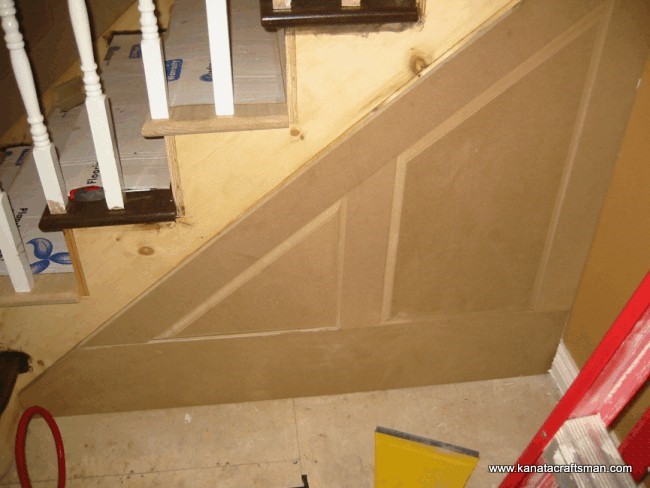
Note the Pepsi box which we used to place the caulking gun with our PL premium construction adhesive when we were not using it. This adhesive if a handyman’s best friend but it can be your worst nightmare if someone was to step on some fresh glue and track it across those nice oak treads. We left the landing in place and installed unfinished oak hardwood on the landing so we could match the stairs. Keep in mind that you have to sand unfinished hardwood after it is installed before you can stain and varnish it. It isn’t as easy as prefinished but we wanted this to be an exact match of our stairs. 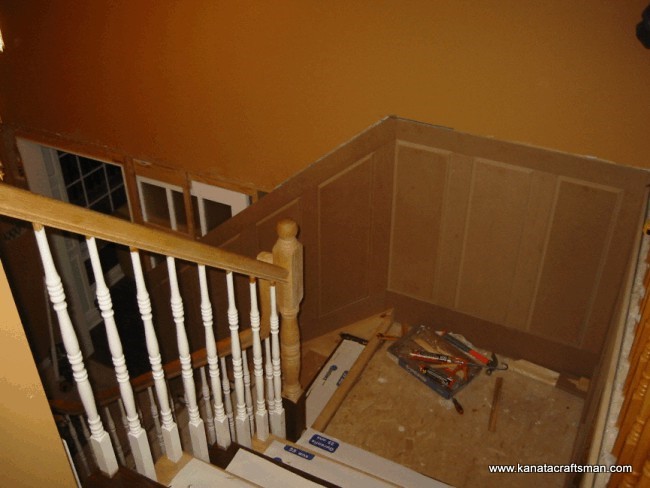
The stair treads are all stained and varnished and our raised paneling is complete and ready for primer. Tackling this job in order, it’s a good idea to finish the stair treads as quickly as possible to protect the wood. An accident with primer or paint drippings from a brush or roller is a lot easier to remove when your treads are stained and varnished. 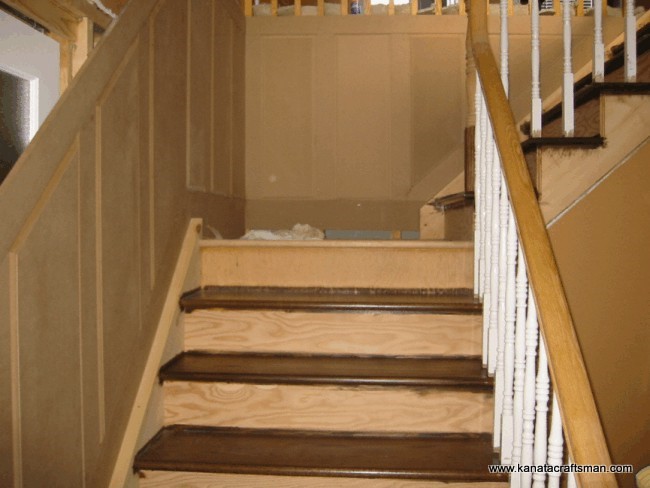
The project is starting to look better than the picture but we will admit we are biased! You are the judge but the main difference we will cite is there is no trim necessary where the oak tread meets the riser and stringer. 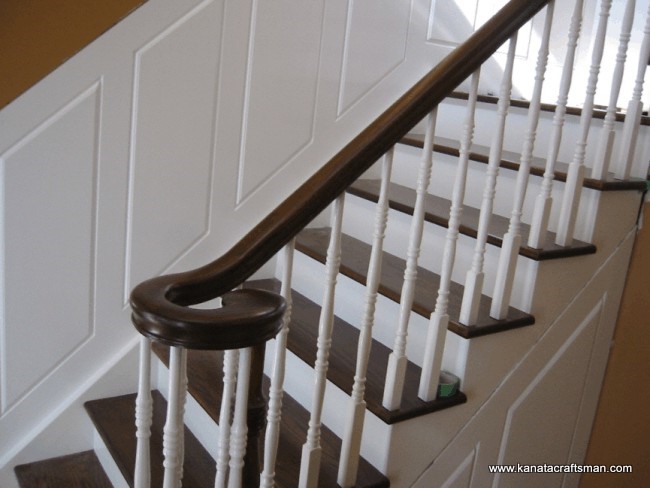
Of course getting away from having to use trim between your risers and treads is a lot easier to accomplish when building a new staircase from scratch. However, this can be accomplished even when resurfacing old stairs. It is more difficult and time consuming but if you want your refinished staircase to look like they were installed by a professional, this is the only way to go. 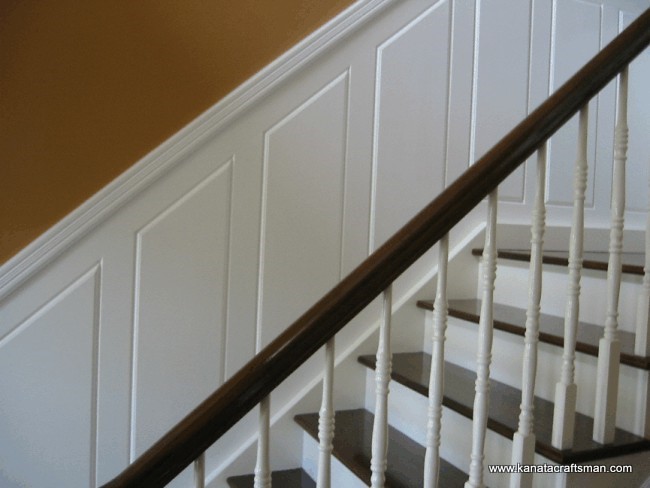
There was a quarter inch difference where our MDF raised panel met the stair stringer and it was necessary to make custom trim for this piece. Our vertical trim is also custom made as we didn’t want to use a plain cove molding here when there is so much detail in the raised panel. If you look at the baseboard in the corner, we have installed a plinth. This is the way to go when you want to tie in two pieces of different profiled trim. We have seen vertical trim run down to the floor with the baseboard butting against it or vertical trim sitting on top of baseboards. The use of a plinth a little larger that your largest piece of intersecting trim provides the best aesthetic look. 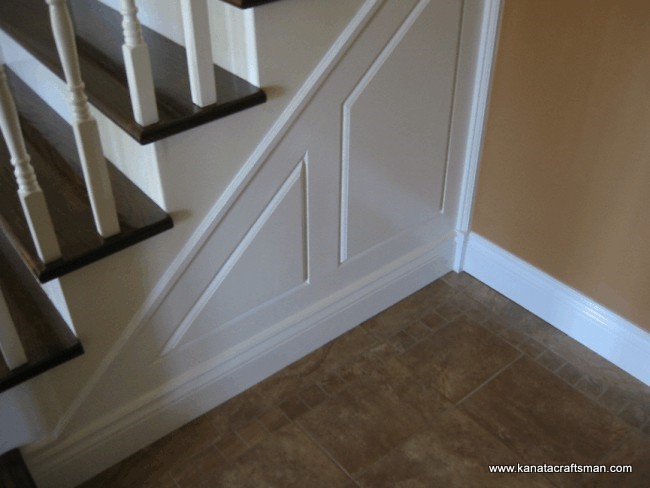
Here’s a closer look at the profile of our trim. You won’t find this sitting on a shelf at any store. 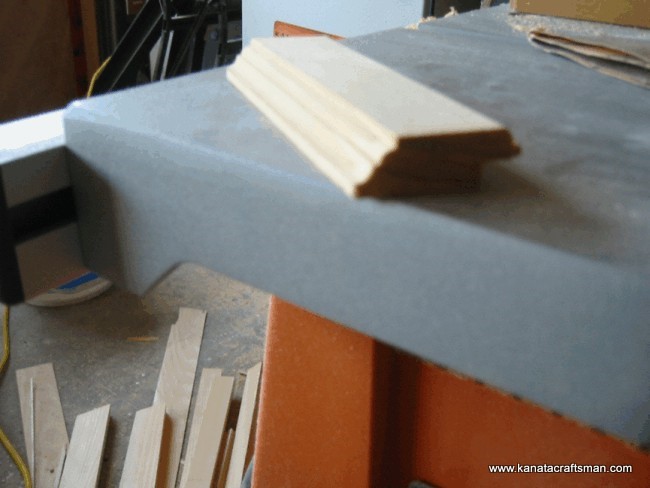
Rather than use molding on the landing, we matched our stringers which really tied the landing and both sets of stairs in together. Staircase was completed so it was time to start our ceramic entrance. 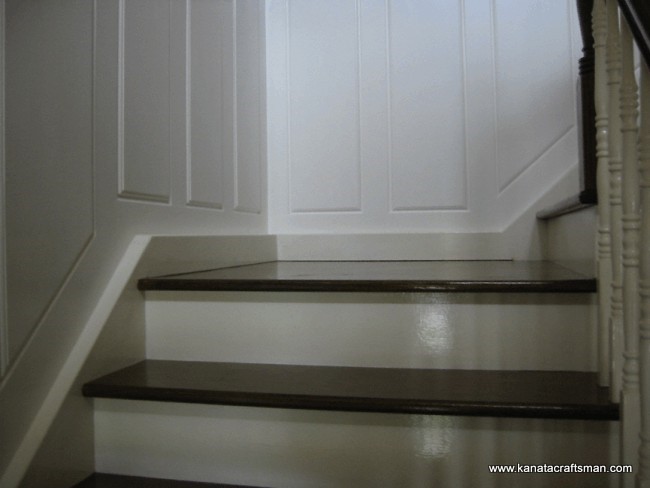
|